macOS Sequoia comes with a simple but very useful new native tool: automatic window tiling. The new feature can be invoked in several different ways and comes with keyboard shortcuts. Here’s how to use automatic window tiling in macOS Sequoia.
9to5Mac is brought to you by the all-new iMazing 3. The world’s most trusted app for managing Apple devices from a Mac or PC is now even better. Try it now.
Automatic window management has been a long time coming as a native macOS feature. For the last two decades, users have relied on third-party apps like Magnet and Rectangle to get auto and custom window tiling.
Now Apple has launched its version of automatic window snapping with the macOS Sequoia beta. While it has Sherlocked Magnet and Rectangle, those third-party apps still offer more flexibility and customization.
In any case, let’s dig into how to use the new native window tiling for Mac.
How to use automatic window tiling in macOS Sequoia
- Make sure you’re running the macOS Sequoia beta (full guide)
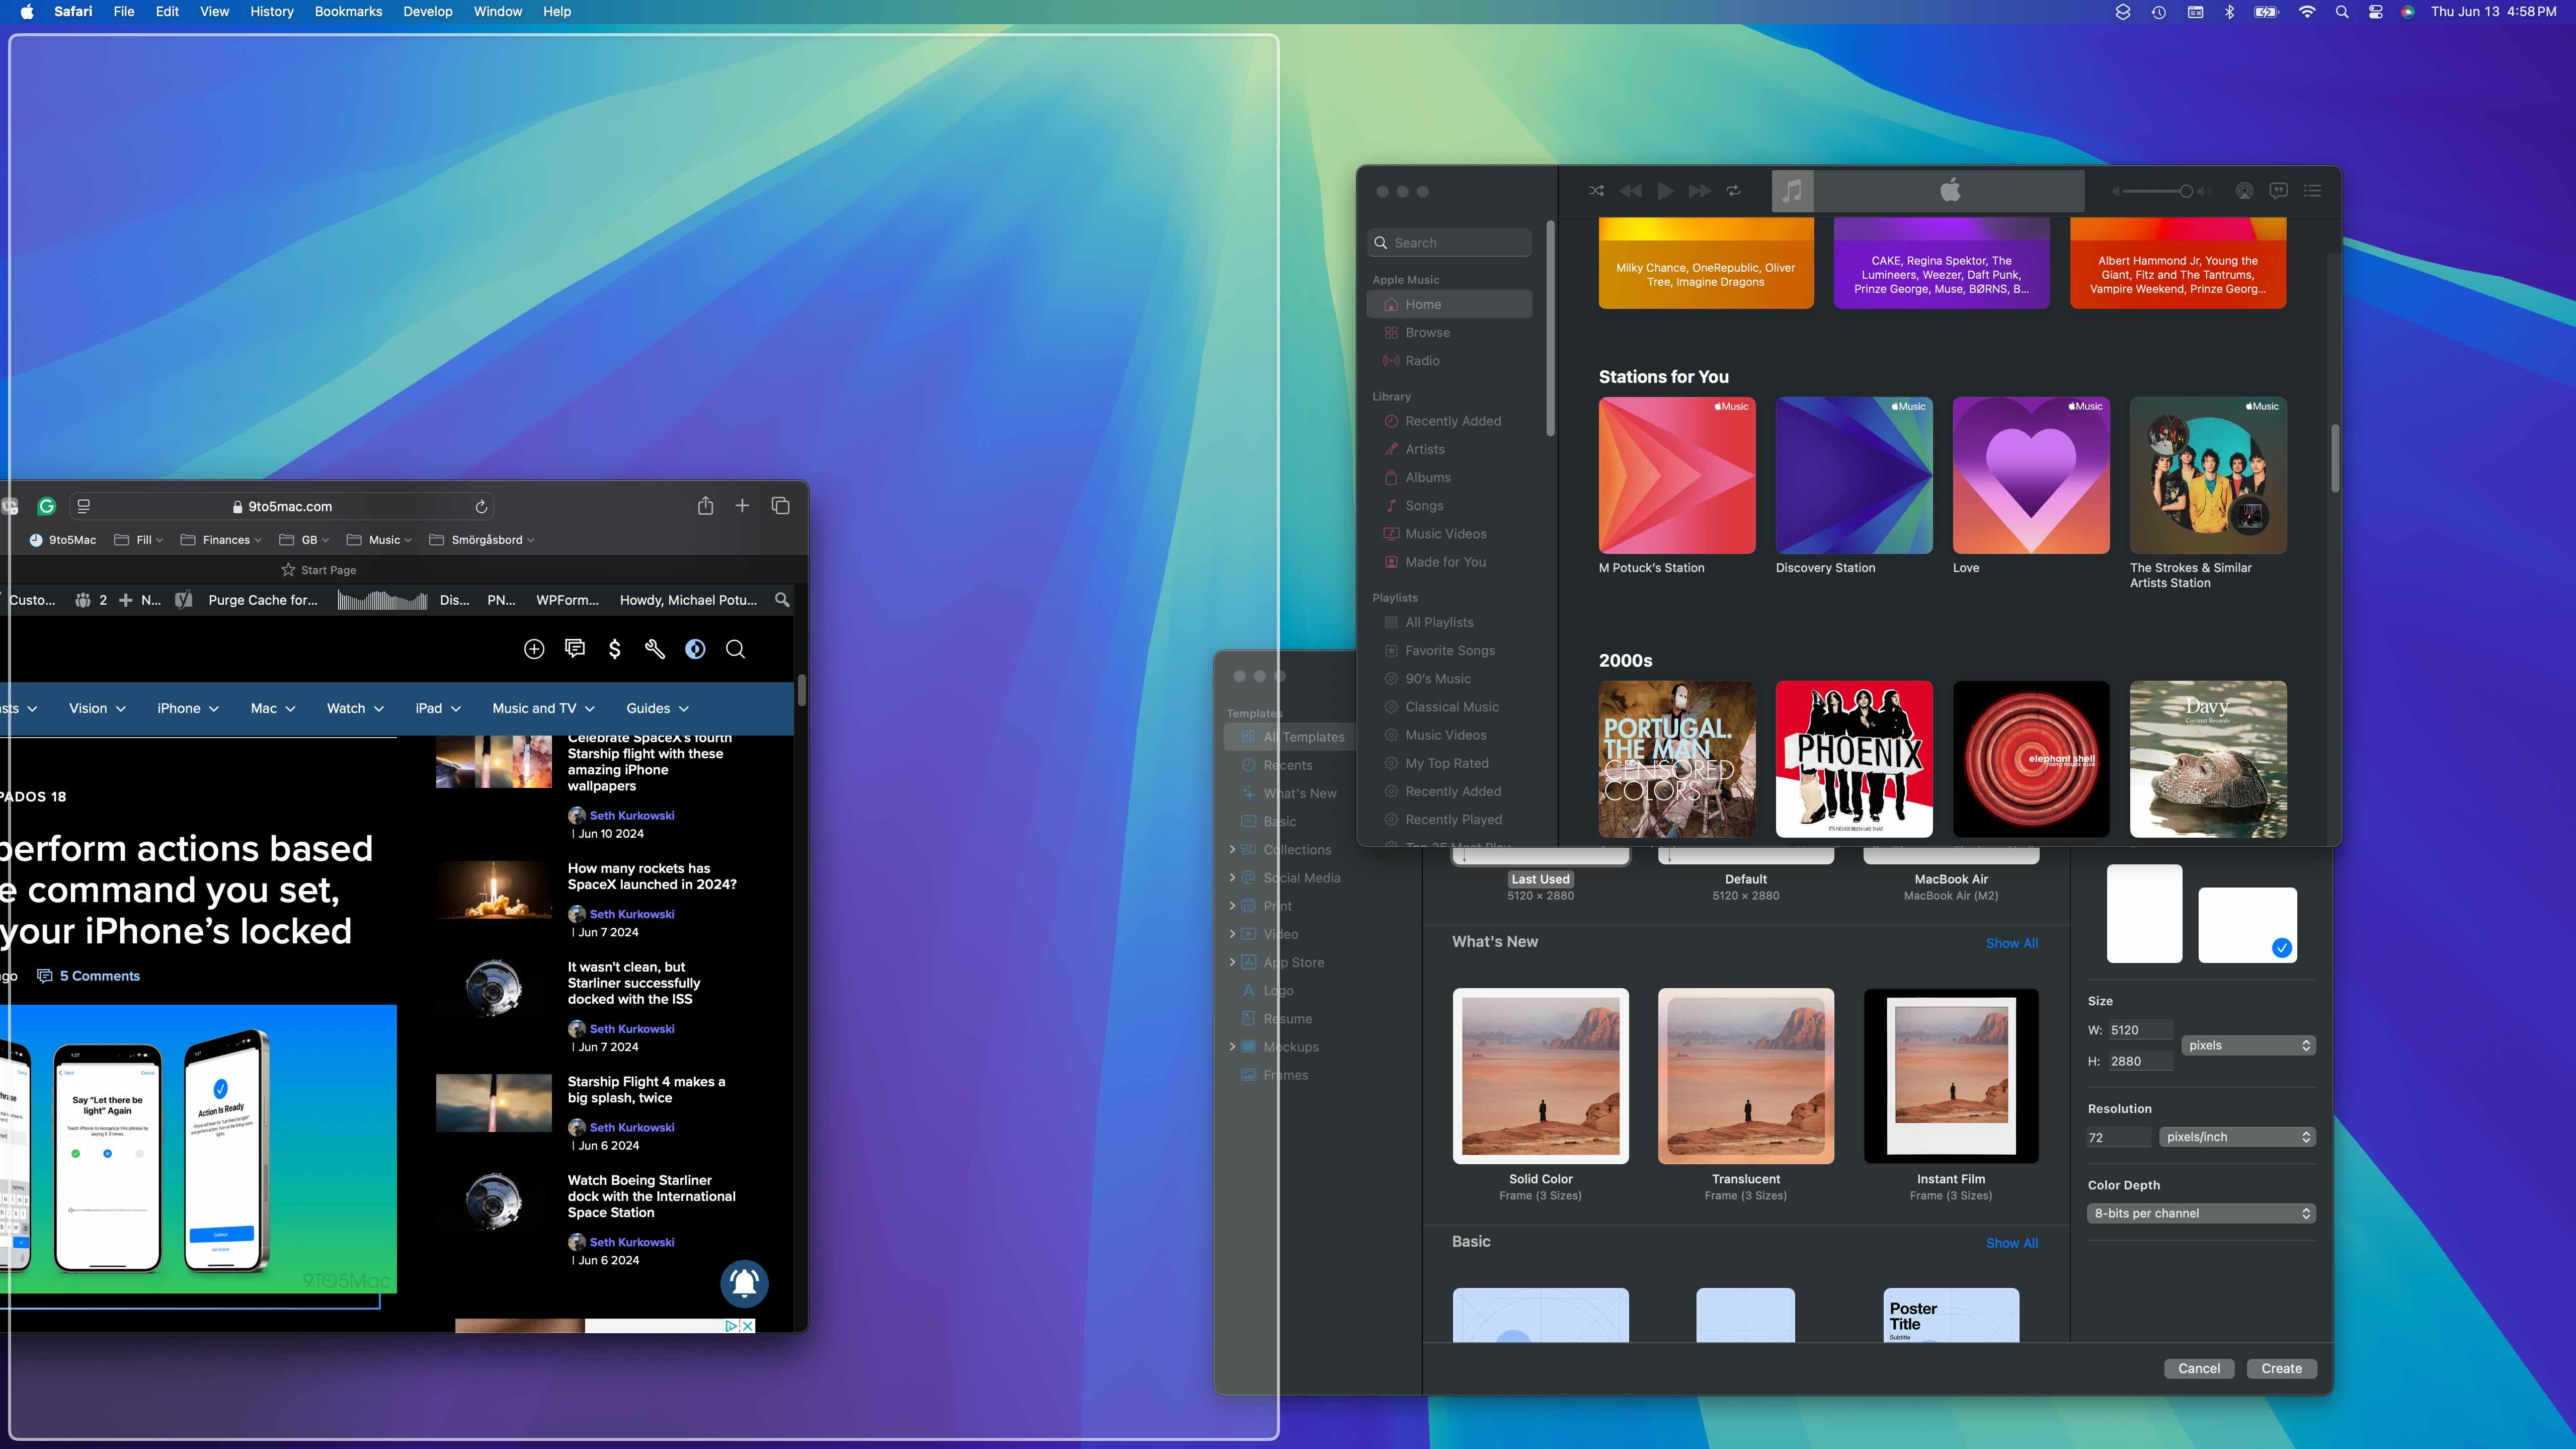
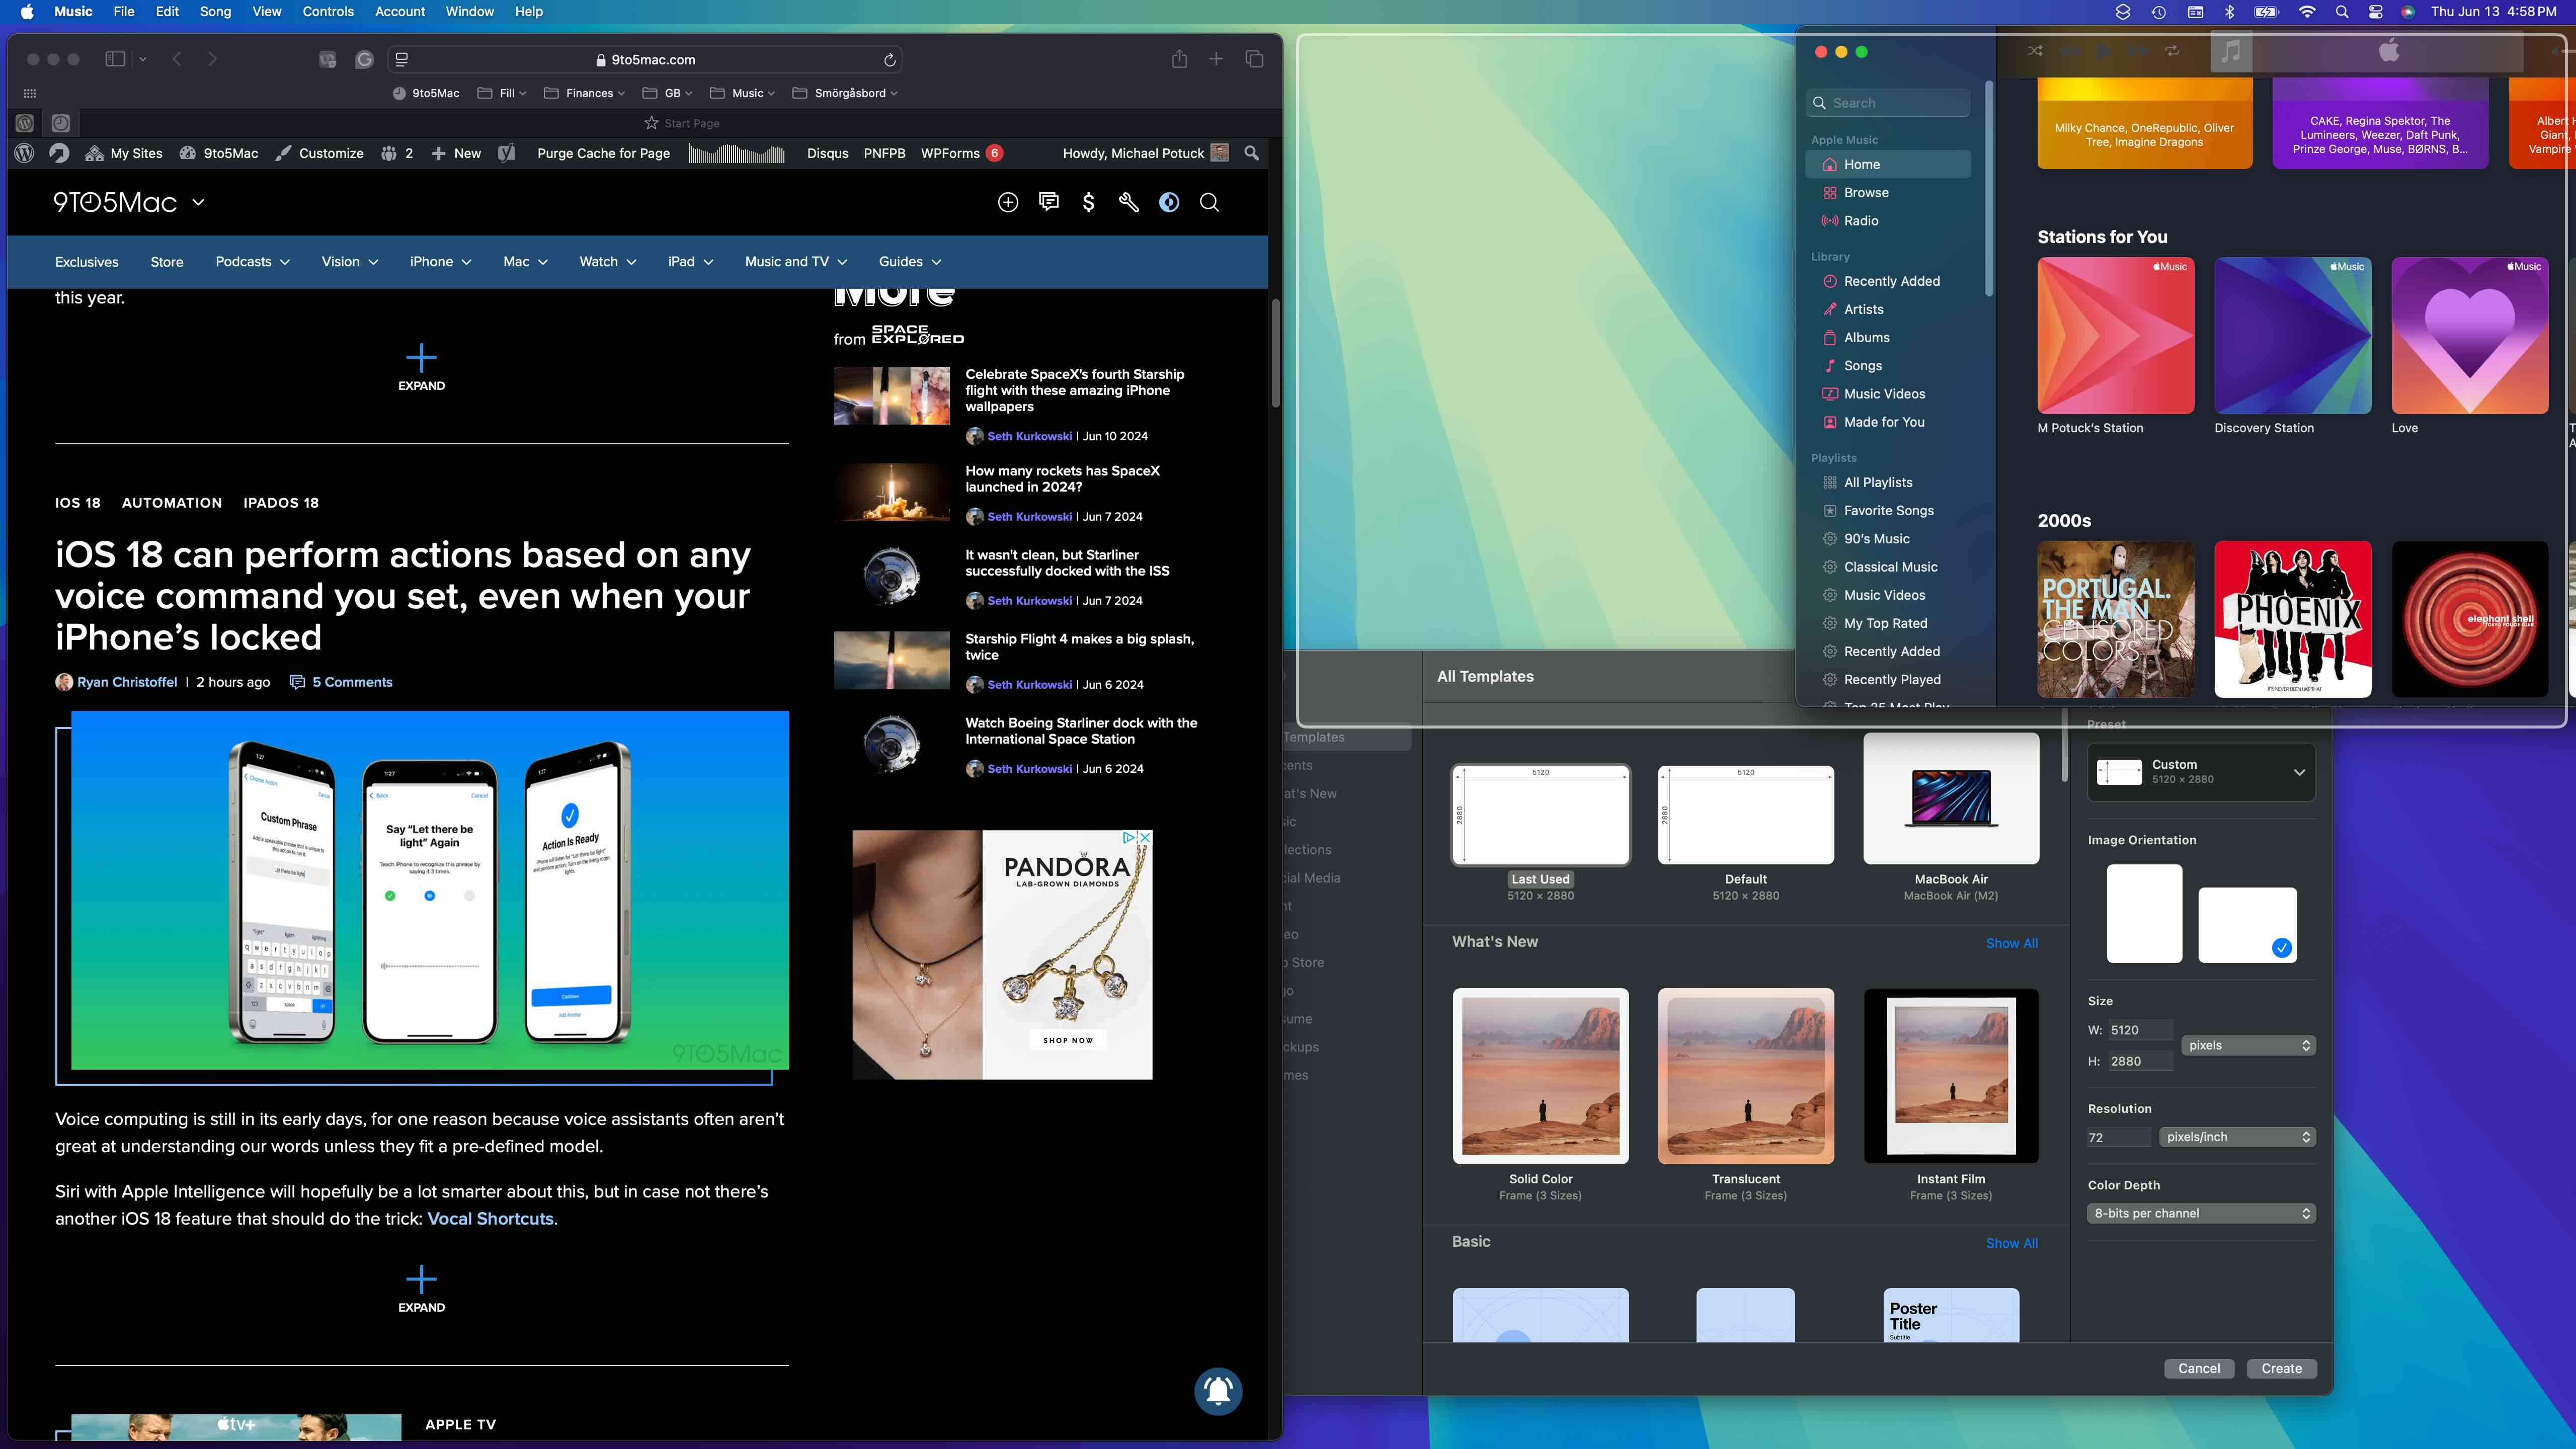
- Drag a window to a side, top, or bottom edge or a corner of your Mac’s screen
- You’ll see a gray border to preview the window tile, when you let go your window will snap into place
- Dragging to an edge will create a half-screen window and dragging to a corner will create a quarter-screen window
- Keyboard shortcuts for automatic window tiling are also available
- To make a window a half-screen tile, use function + control + the left, right, up, or down arrow.
- You can also rearrange window tiles with function + control + shift + the left, right, up, or down arrow
- And function + control + R will return a window tile to its previous size
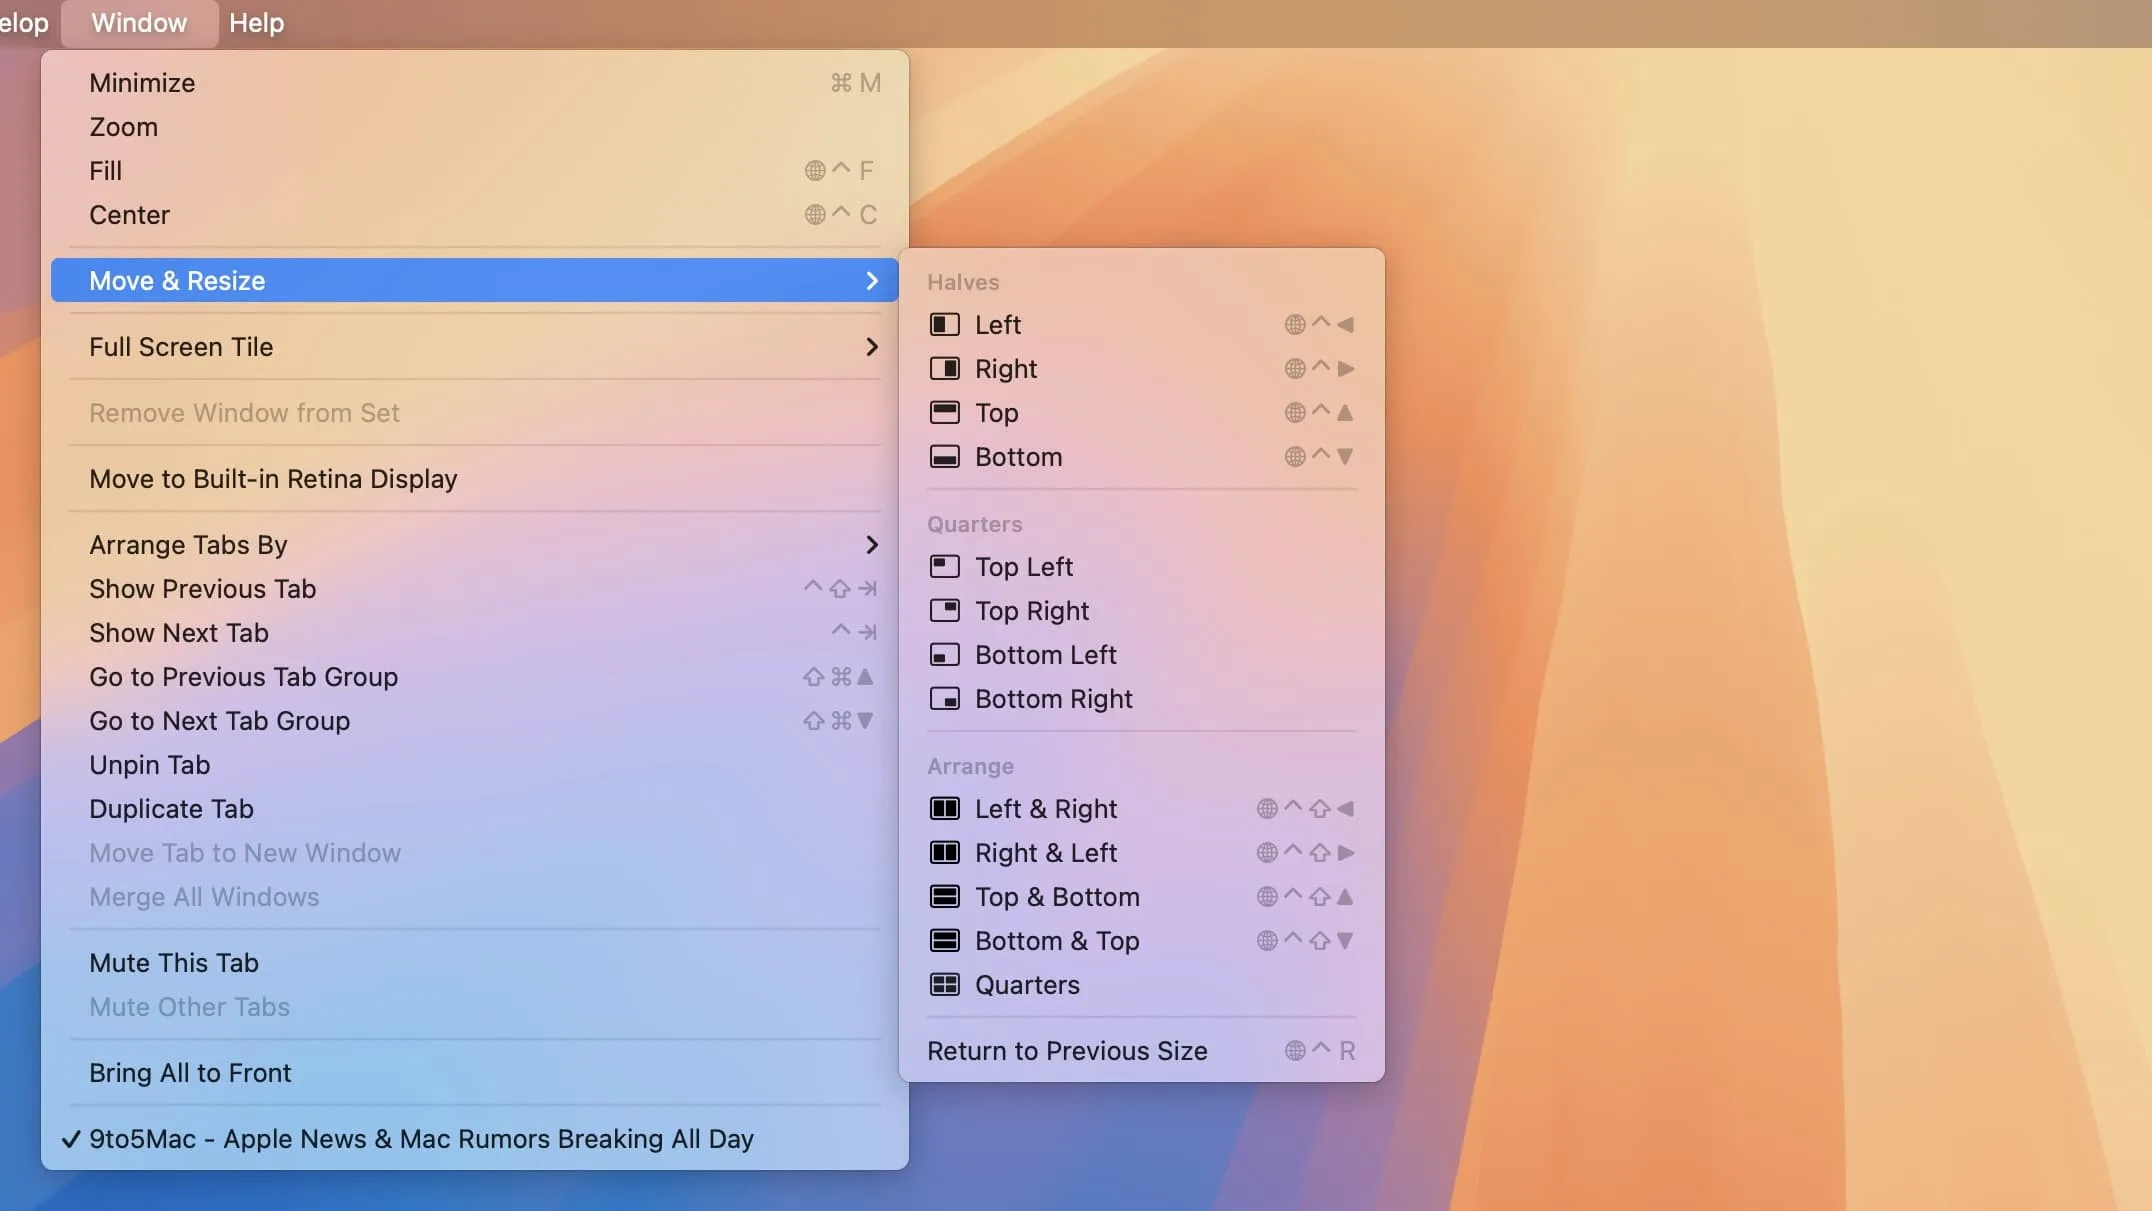
- Two more options to access window tile control are hovering over the green maximize window button in the top left corner or in the menu bar by choosing Window > Move & Resize
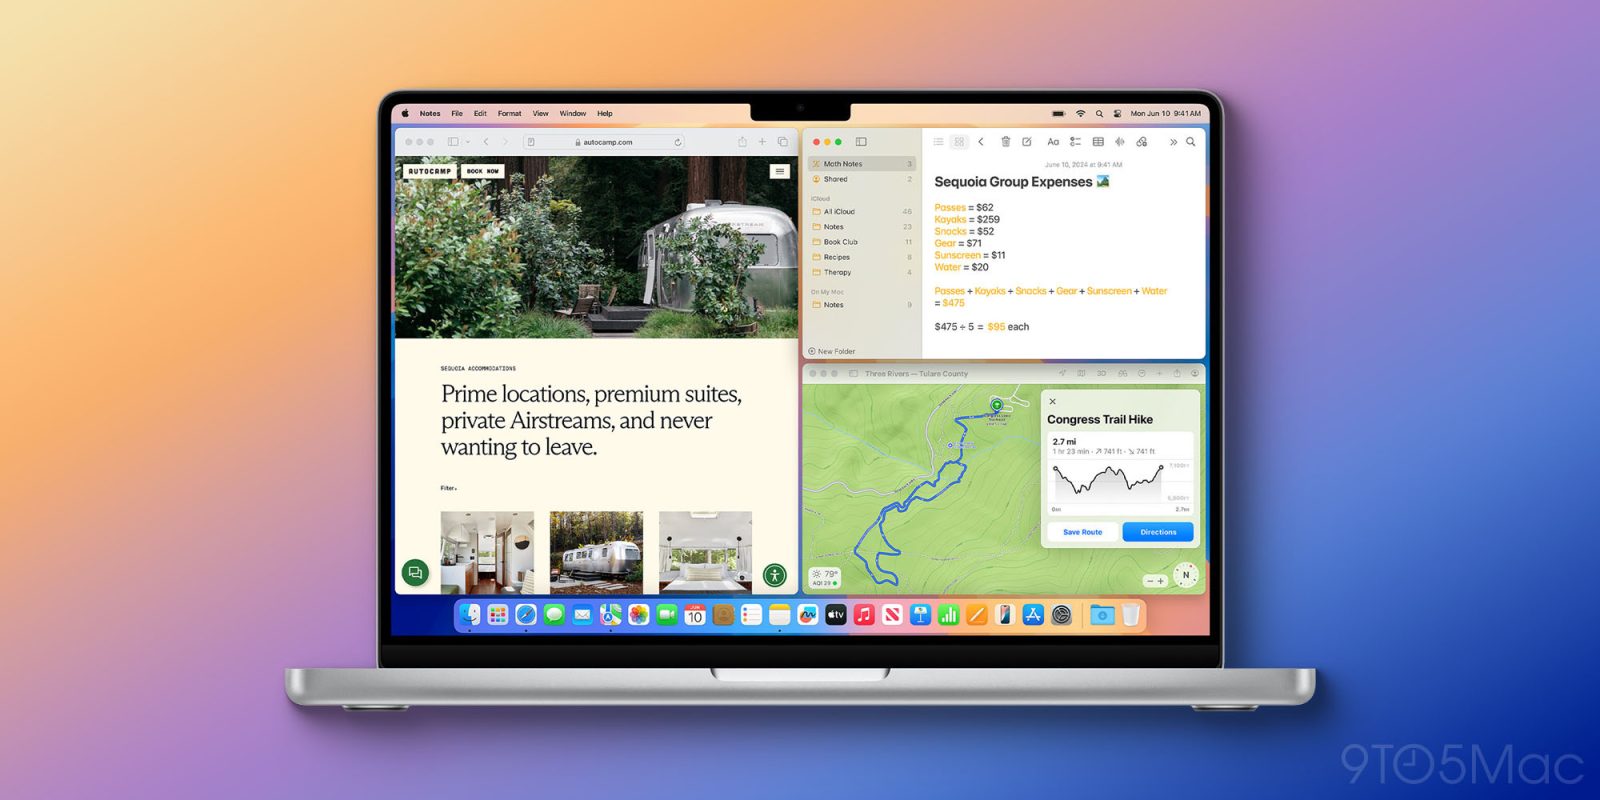
Here’s how it looks to use automatic window tiling in macOS Sequoia:
Above on the left, you can see what converting to a half-screen window looks like.
And below I’m dragging the top right window to the corner for a quarter-screen tile.
Here’s a full-screen setup. One thing to keep in mind, using the native auto tiling does leave an ~8-pixel border around the edge of your screen and in between windows (see below).

When you manually move a window after using the auto tiling, it will return to its previous size.
You can always pull up the new keyboard shortcuts in the menu bar > Window > Move & Resize. At this time, there aren’t shortcuts for creating quarter tiles.
What do you think about native automatic window tiling in macOS? Share your thoughts in the comments!
9to5Mac is brought to you by the all-new iMazing 3. The world’s most trusted app for managing Apple devices from a Mac or PC is now even better. Try it now.
FTC: We use income earning auto affiliate links. More.